
MOBILETrak User Guides

MOBILETrak PRINT ONLINE USER GUIDE
Quick Navigation
INTRODUCTION

Welcome To Your Home Page
Here you will find all the options for printing labels or item lookup. Each of these three buttons will take you into a sub menu that walks you through how to make the most of your MOBILETrak Print.
Quick Navigation
This menu, expanded by pressing the 3-lined button in the top left of your screen, serves as your short cut to navigate back to the Start Screen, either of the printing options, or your Item List. This navigation tool is a great way to get back to a clean slate after delving deeper into any of the three sub menu options.

ITEM LIST

Your Item List
The “Item List” function serves as your search tool for your specific items. Item inquiry is made simple with the ability to pull a specific item by scanning or typing an item’s description, MCs, or SIM.
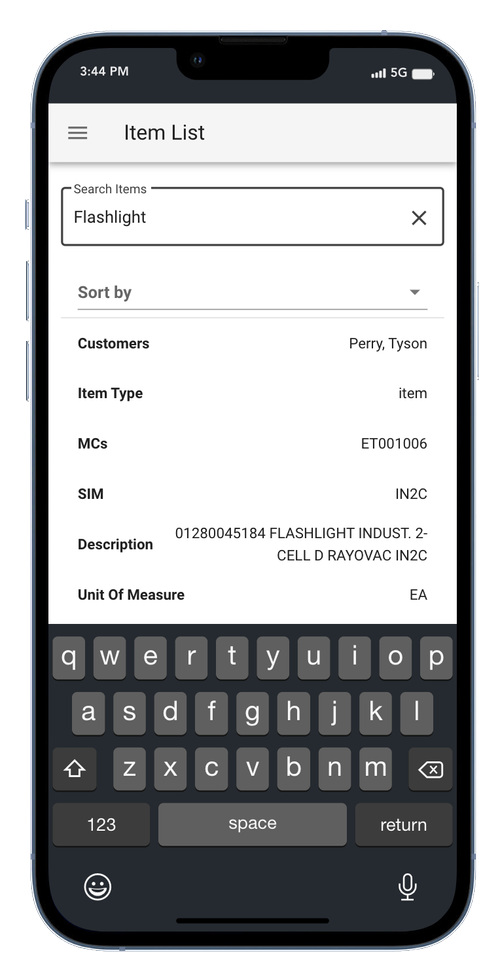
Searching Using the Description
By simply typing the word “Flashlight”, I triggered the Item List to show only the items with that word in the description. This will prompt the list to show us ALL of the items that have that word contained within them.
Filtering Using the Material Code
Another way to filter your list is to type or scan the item’s material code. Here, I typed in “ET001006”. This pulled up our flashlight that we used in the previous example. There are many ways to sort and filter your lists to make item inquiry as seamless as possible.


Sorting Your Item List
By using the “Sort By” drop-down function, you have the ability to sort your list by specific item details such as customers, item type, description, unit of measure, and so on.

PRINT SHIPPING LABEL
Preparing Your Shipping Labels
Using the expandable dropdown list or your keyboard, select the customer you are preparing a shipping label for. You will then want to scan or type either the material code or the SIM number for the material you will be shipping.
Entry Validation
Here, we see that by using a valid customer and material code for our label, the search boxes are highlighted in green. This helps to ensure we are using correct material code entries and that our entry is a valid material code in our item list.

Selecting Print Location and Label Size
At the very bottom of our screen we see a dropdown for “Printer/Label”. Using the dropdown will show us our available printers and label sizes to choose from. Here we see that we can choose from either “printer 1” or “printer 2”. The label size options can be changed and customized on our end to fit the user’s needs and desired size. To further our example, I selected “Printer 1”.

Moving Forward With Our Shipping Label
Knowing that our Customer and Material Code entries are valid, as highlighted above, we are now ready to move forward with our label. When we press “enter” on our keyboard or press the “search” button, our program fills in the rest of the information for our item. The item type, SIM, unit of measure, and description are all automatically fetched and filled in for us.

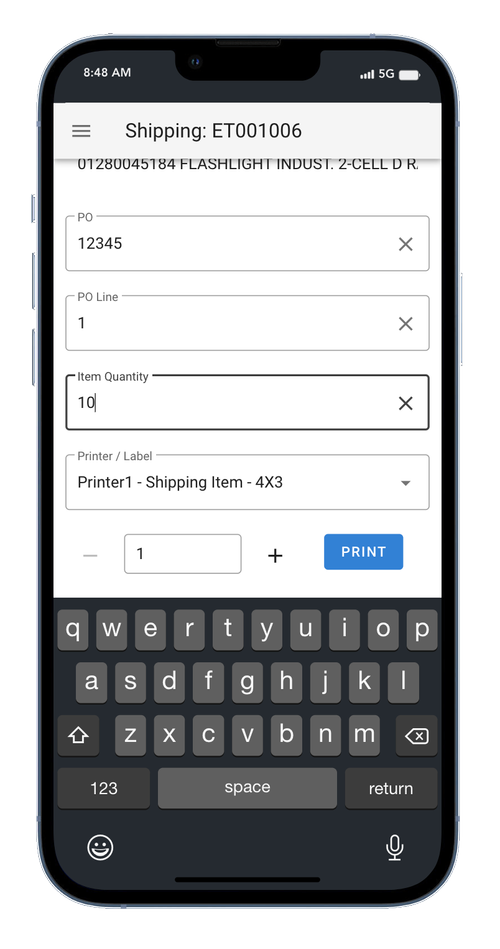
Let’s Print Your Shipping Label
Now, all there is left for the user to do is to fill in the PO information and to enter in the quantity of this item that we are shipping. At the very bottom next to the blue “PRINT” button we see “+” and “-” buttons. These buttons can be pressed to manipulate the number of labels we are going to print. For this instance, we only need one label. Finally, we would press the “PRINT” button and our new shipping label would be sent to our selected printer.
PRINT RECEIVING LABEL
Preparing Your Receiving Labels
Using the expandable dropdown list or your keyboard, select the customer you are preparing a receiving label for. You will then want to scan or type either the material code or the SIM number for the material you will be receiving.
Entry Validation
Here, we see that by using a valid customer and material code for our label, the search boxes are highlighted in green. This helps to ensure we are using correct material code entries and that our entry is a valid material code in our item list.
Moving Forward With Our Receiving Label
Again, once we type or scan in our valid material code, the Item Type, SIM, Unit of Measure, and Description fields will be automatically filled for you. You are now ready to input the quantity of items you are making the receiving label for.
Let’s Print Your Receiving Label
With all of the required fields being satisfied, all there is left for you to do is, like before, select the printer location and label size you are wanting to print. You will then use the “+” and “-” buttons to manipulate the number of labels you are going to print. Finally, everything is filled out and looks great; it’s time to print your label(s)!